How to print from a wireless Apple MacBook running OS X 10.4 (Tiger) to a shared printer on a Windows XP computer.

It’s hard to share printers on a network. Always has been, always will be. Of course, it should not be this way. Computers should be easy to use, and they have gotten easier through the years, but it puzzles me that something so simple is still so difficult.
In any event, here’s the scenario:
- You have a printer, perhaps an older printer. Said printer is connected to your Windows XP computer. You have given said computer a short name with no spaces and shared it. Other Windows computers on you network can happily print to it.
- You have a Mac. Perhaps connected to your network wirelessly. Perhaps you don’t like lugging a laser printer in your computer bag. Perhaps you don’t want a printer in every room in your house. Or cables strewn across the floor. So you have decided to try to print to the shared printer.
- You are completely insane. OK, maybe not completely insane. Maybe Apple is insane. Maybe it’s Microsoft. In any event, you think this will be easy. Bwah hah hah! Wrong.
- You Google for answers, disappointed at the shreds of information here and there that provide only pieces to the puzzle. Then you find this article. Your problems are solved.
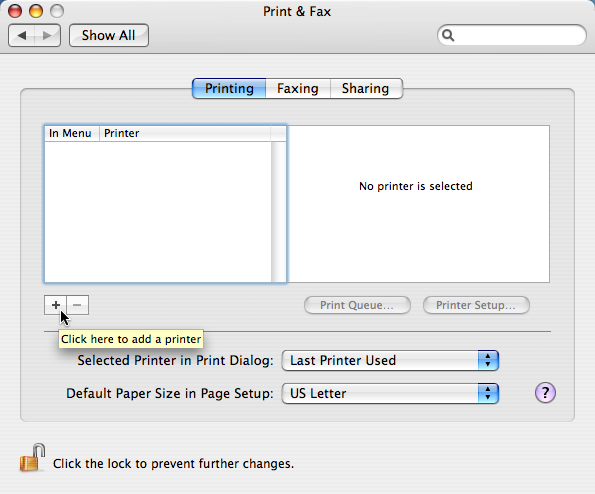
First, in OS X, open System Preferences and select the “Print & Fax” option. Click the “+” button to add a new printer. As you mouse-over the button, the words “Click here to add a printer” will display. (Hmm, hidden options. I sense foreshadowing.)
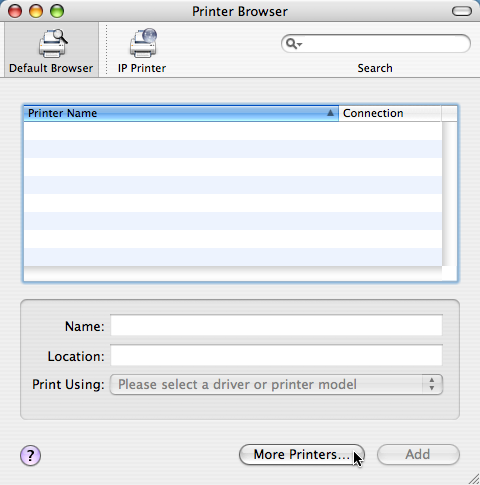
Next, from the “Printer Browser” window, click on the “More Printers…” button. (Note that “more” also means “more than zero”.)
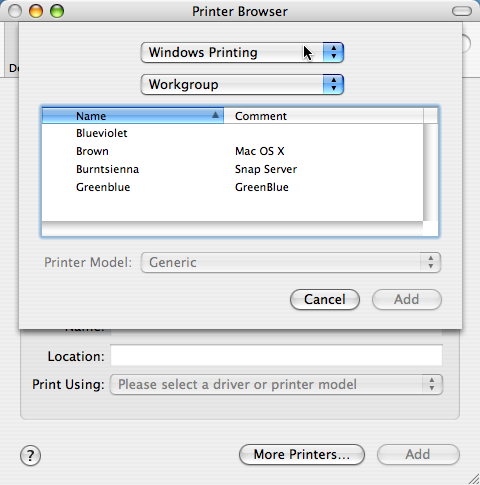
From the first pop-up menu, select the “Windows Printing” option. From the second pop-up menu, select the “Workgroup” option (or whatever you have named your Windows workgroup). As you may know, OS X doesn’t always play nicely with workgroups that are not named “WORKGROUP.” Ain’t networking grand?
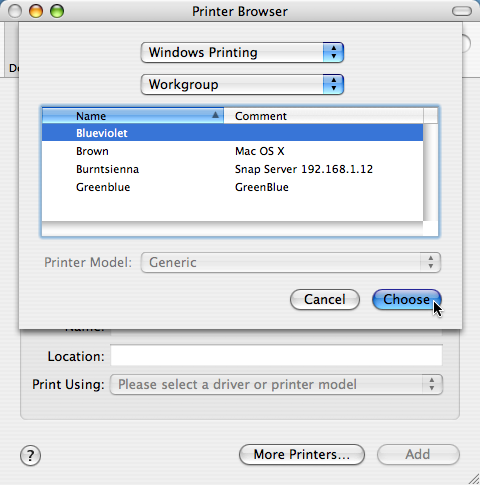
Next, select the computer with the shared printer attached to it and click the “Choose” button.
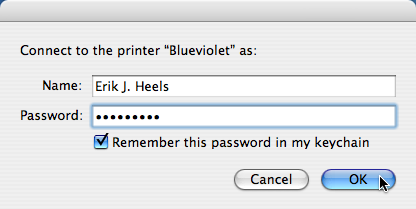
You will be prompted (ironically) for a username and password. Enter those, optionally check the “Remember this password in my keychain” option, and click the “OK” button.
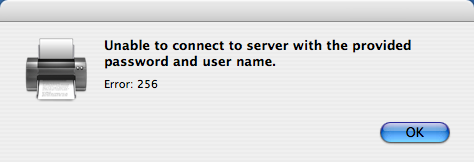
You’ll likely get an error message that says “Unable to connect to server with the provided password and user name.” that is labeled “Error: 256”. (Isn’t “username” one word?) Note the lack of helpful information in this error message. Do you know what error 256 is? I sure don’t. Hmm.
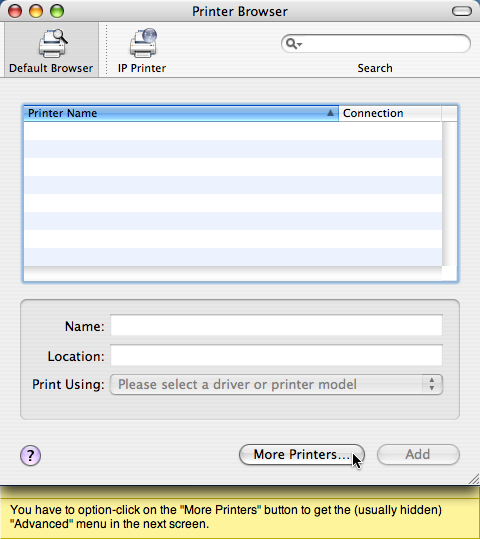
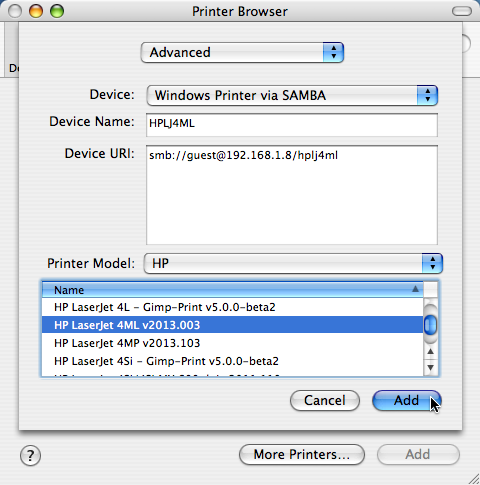
Now comes the magic, silly, undocumented, user-hostile trick that you were supposed to just guess. I added a sticky note to my screen to capture the beauty of this trick. Here it is. Go back to the Printer Browser window. You have to option-click on the “More Printers” button to get the (usually hidden) “Advanced” menu in the next screen. Now why didn’t I think of that?
From the first pop-up menu, select the (now unhidden) “Advanced” option.
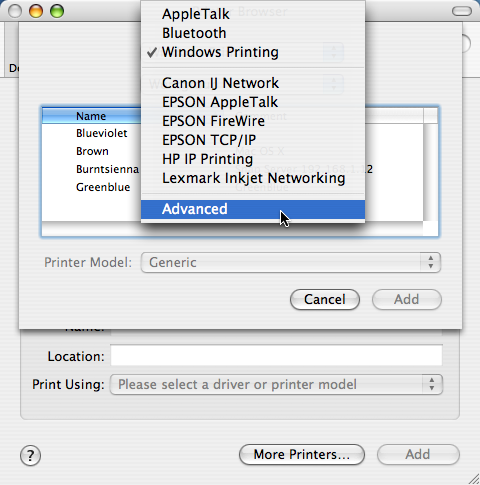
For the Device option, select “Windows Printer via SAMBA.” For the Device Name option, select the name of the shared printer (no spaces, and there is probably a maximum number of characters, like 8 or something, but I’m not sure). For the “Device URI” option, select an address of the form “smb://guest@192.168.1.8/hplj4ml” where “192.168.1.8” is the IP address of the Windows computer with the shared printer and “hplj4ml” is the name of the shared printer. From the Printer Model pop-up menu, select your printer manufacturer (this menu should be called “Manufacturer Name” menu). From the Name windows, select the printer model (this window should be called the “Printer Model” menu). Then click the “Add” button.
Now you’ll be able to print from your OS X computer to a shared printer on a Windows XP computer. But, honestly, this should be a lot easier. Attached shared printers should just be discovered by OS X, and advanced options should not be hidden by default. Memo to Apple: fix this. Apple computers are supposed to be easy to use.

